Building a Garden Arbour
Building a Garden Arbour #
During our spring planning for our garden, we decided to build a garden arbour to replace a sort-of path through our front garden bed by the entrance to our home. We wanted to create a nice path to enter our front yard and provide a place that we can grow plants or vegetables over a trellis.
Planning #
I did a bunch of reading and searching, but got the majority of my inspiration from this article on Handyman Magazine. I liked the style of the cross beams going through the posts, and the trellis on the sides. I made a few changes, but the core structure was the same.
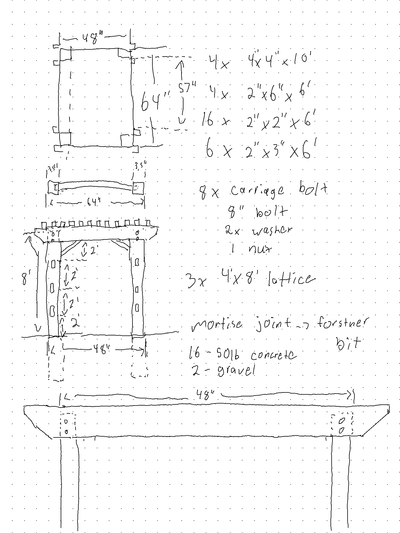
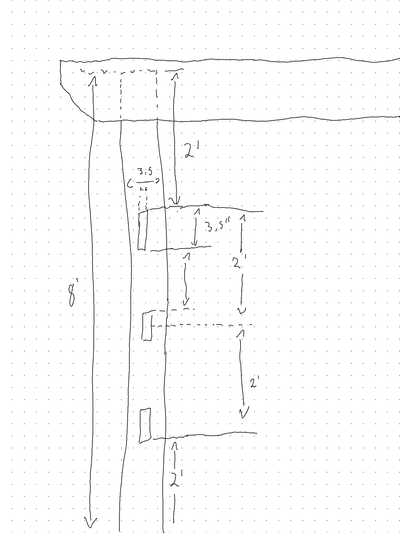
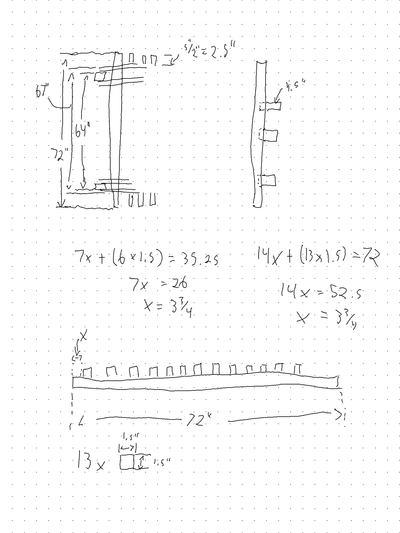
Here are the sketches I did while planning things out. I had to adjust for a different foot print and changes from using slats to premade lattice, so its a bit different than the original design.
Materials #
- 4 - 4x4x10' fur posts
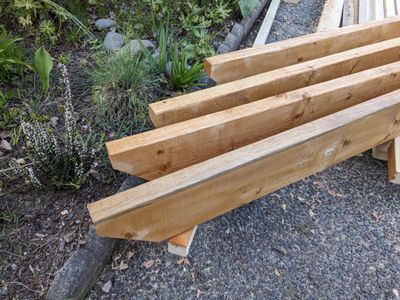
- 4 - 2x6x6' pine boards
- 16 - 2x2x6' pine slats
- 6 - 2x4x6' pine boards
- 2 - sheets of 4'x8' lattice
- 8 - 1/2"x8" carriage bolts (plus nuts and washers)
- 10 - 50lb bags of quickcrete
- 2 - 20lb bags of pea gravel
- Stain and wood preservative
I opted for fur and pine instead of cedar or treated wood to save some money. I would have preferred to use cedar for the look, but cedar was at least 3x the price of fur. I don't like the look of treated wood, so I opted for the fur posts and pine boards, and found a nice red cedar stain to give it the look I'm going for. It may knock a few years off the life of the arbour, but I think it will be enough for our needs.
Construction #
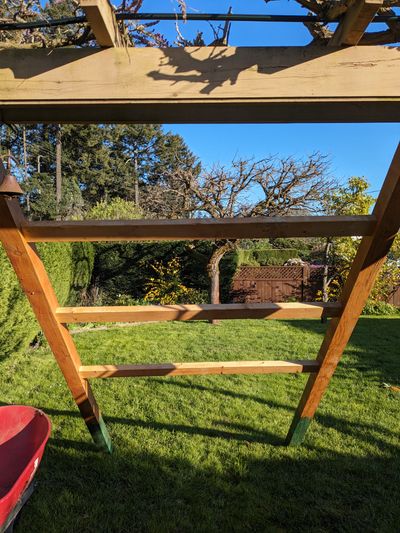
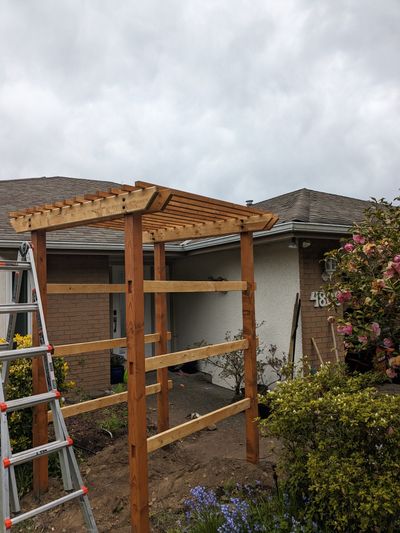
At the behest of the guide from handyman magazine, I built each side as a single unit, and then place two posts in their holes at the same time. Then I would connect the two sides with the cross beams, and add the slats and trellis after assembly. I think this method worked fairly well, but it made it challenging to get the posts perfectly level, while also keeping the cross members square.
Step 1: Mortise Joints #
I cut the mortise joins in the posts using a forstner bit, a router, and a chisel. I cut the mortises ~1" deep and sized them to fit the 2x4s. I didn't do anything to the 2x4s, and just used screws to attach them to the posts.
- I measured and marked the mortises on the posts using a ruler, a pencil, and then end of a 2x4 scrap as a template.
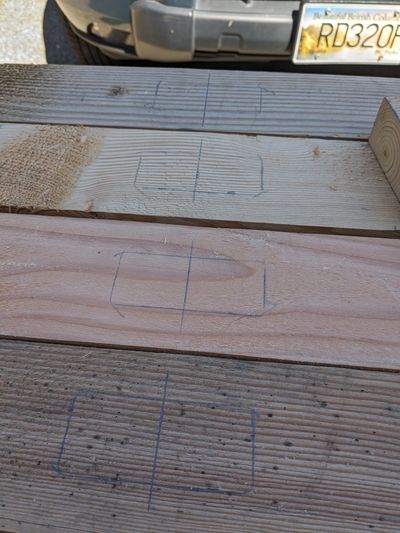
- I drilled out the mortises using a forstner bit. It would have been nice to have a jig, but it worked ok doing it carefully by eye. The most challenging part was ensuring that the depth was good. Initially I had not planned to use a router, so I had to be careful to not go too deep.
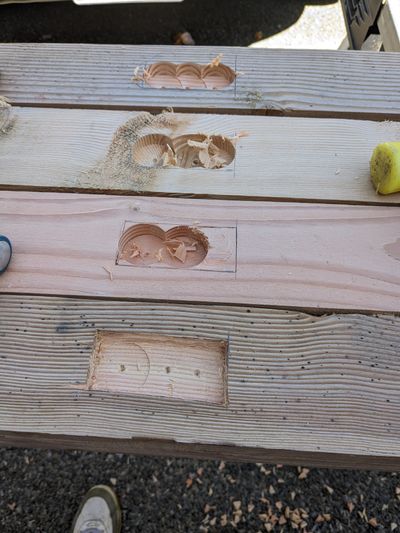
- At first I used just the chisel after using the forstner bit, but I found it quite slow going, so I eventually decided to use a router, and then do final cleanup with the chisel. Again, a jig would have been nice, but I just did it by eye. I nicked the edges in a few places with the router, but in the end it gave it a sort of hand-hewn look that I think is nice.
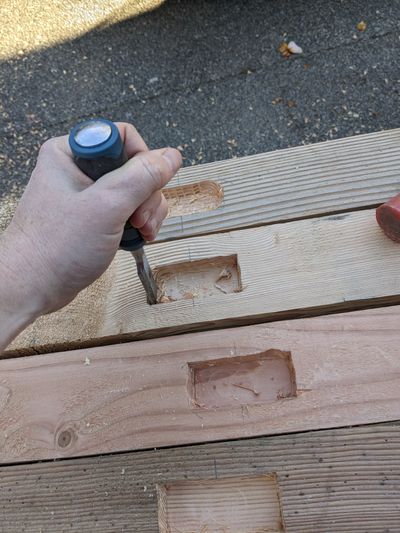
I repeated the process for the mortise joints on both sides of each post.
Step 2: Assemble the Sides #
I cut the inner part of the 2x4s to length, slotted them into the mortises, and then screwed them in place. It was actually a bit of a pain to get all 3 boards seated in both posts at the same time, as some of the mortises were snug, and others were loose. I had to use a mallet to get them all seated. Once seated I screwed them in place using 3" deck screws.
I don't have great photos of this process, but there is not a ton to see.
One detail to note about the post from the photo. Since I used fur, I stained the bottom of the posts (that will be below grade) with a wood preservative. I stained the rest of the posts with a semi-transparent red cedar tinted stain.
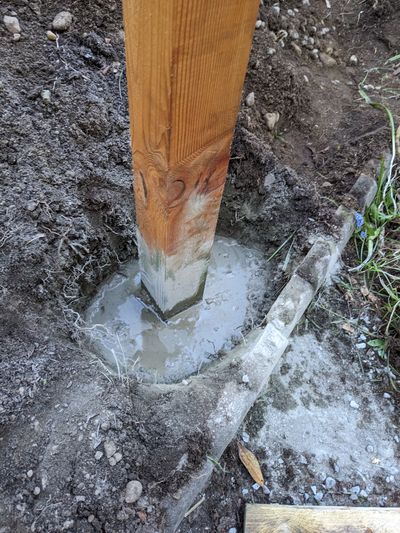
Step 3: Dig the Holes and Set the Posts #
I used a spade and a post hole shovel to dig the holes a little over 2' deep. I wanted the posts 2' below grade, and I wanted room to put gravel in the bottom of the hole. The posts sit directly on the gravel so that water can drain freely, and hopefully give the posts some extra life.
After digging the holes to right depth I added a few inches of pea gravel. Then I place both posts in the holes, and used a post level to get them plumb. I moved gravel around in the bottom of the hole to adjust the height of each post to ensure that it was plumb in both directions. I used a stake and a piece of scrap wood to brace the posts while I filled the holes with quickcrete.
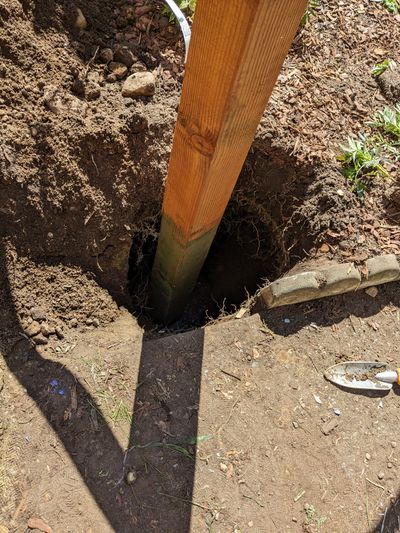
I filled each hole with 2.5 bags of quickcrete, adding water as I went. I used a stick to mix the concrete in the hole. The brace held the posts in place while the concrete set.
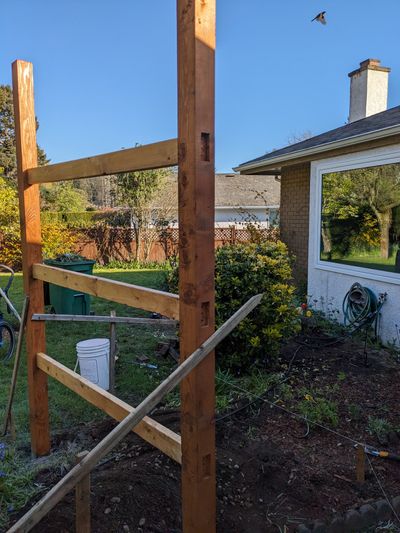
I did this for both sides. It was a bit more complicated for the second side, as I had to ensure that the sides were also level with each other. I did the second one after the first was set, so that I could use the first as a reference and not worry about it moving or shifting.
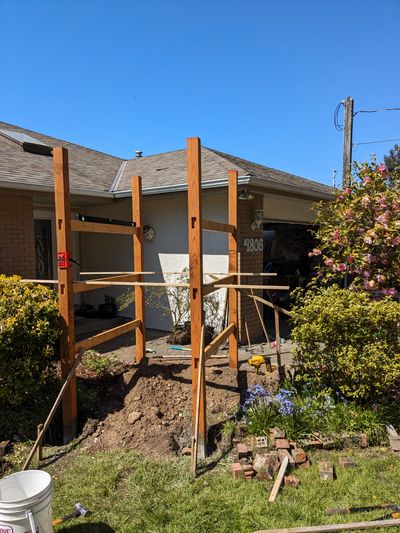
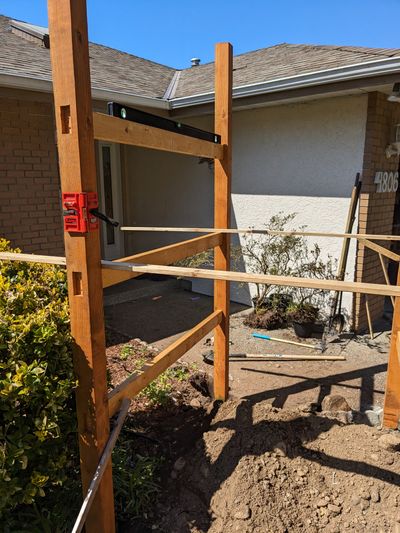
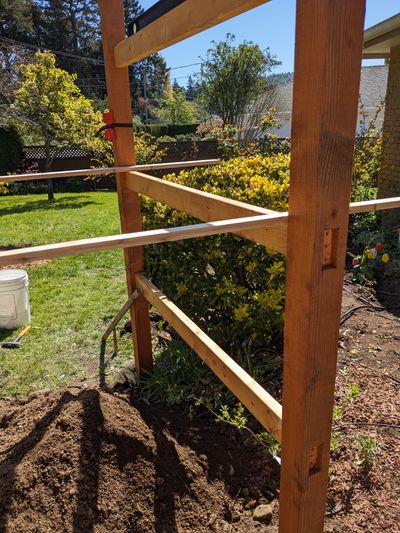
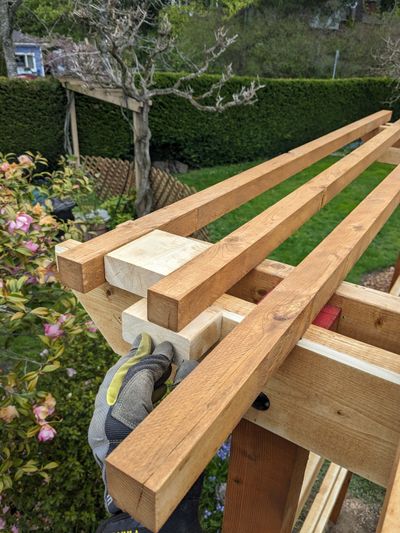
Step 4: Add the Cross Beams #
I cut the cross beams to length, and then cut off the corners to give them a bit of a chamfered look.
Next, I put the cross beams in place so that I could drill the holes and attach them to the posts. I used a brad nailer to tack the cross beams in place while I drilled the holes. I tacked all 4 cross beams in place before drilling the holes to ensure that everything lined up properly. I did not want the tops of the posts sticking above the beams, but I wanted the beams as low as possible.
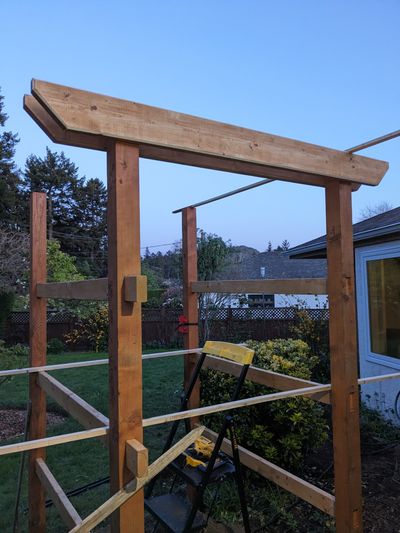
I used a 1/2" auger bit to drill the holes, and then used a mallet to tap the carriage bolts through the holes. I used a washer and nut on the other side to secure the cross beams to the posts.
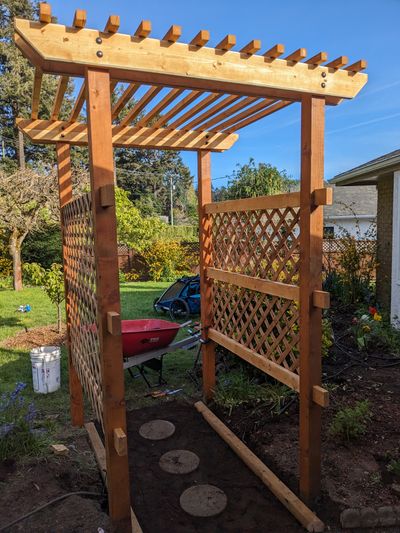
Step 5: Add the Slats #
Once the cross beams were in place I added the slats. I cut the slats to length, and then used a brad nailer to tack them in place. I cut two pieces of scrap wood to size to use as a spacer/measuring stick to ensure the slats were spaced evenly and the overhang was the same. I used the brad nailer to tack them in place, to ensure that I could adjust them if needed.
Once the slats were all in place where I wanted them, I used deck screws to secure them to the cross beams.
Step 6: Add the Lattice #
I cut the lattice sheets to size, and then used my brad nailer to fasten it in place.
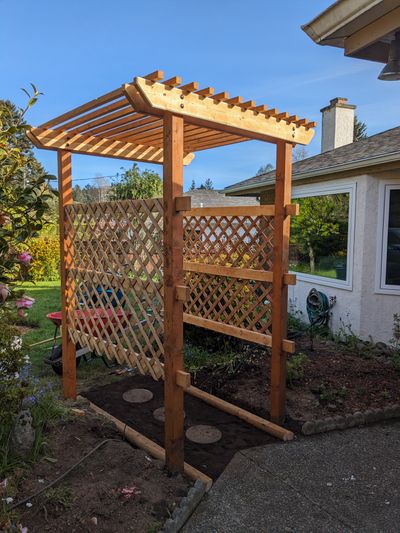
Conclusion #
I'm pretty happy with how everything turned out. It was a bit more work than I had anticipated, but I think it was worth it. I think it looks great, and it will be a nice addition to our garden. My wife planted a special type of thyme that handled foot traffic, so that will fill in the space between the pavers and provide a nice scent when you walk through the arbour.
This year we are growing peas up the sides, and we might consider something more permanent to grow through the trellis next year.
- Previous: Journal: A CRUD developer builds a game